
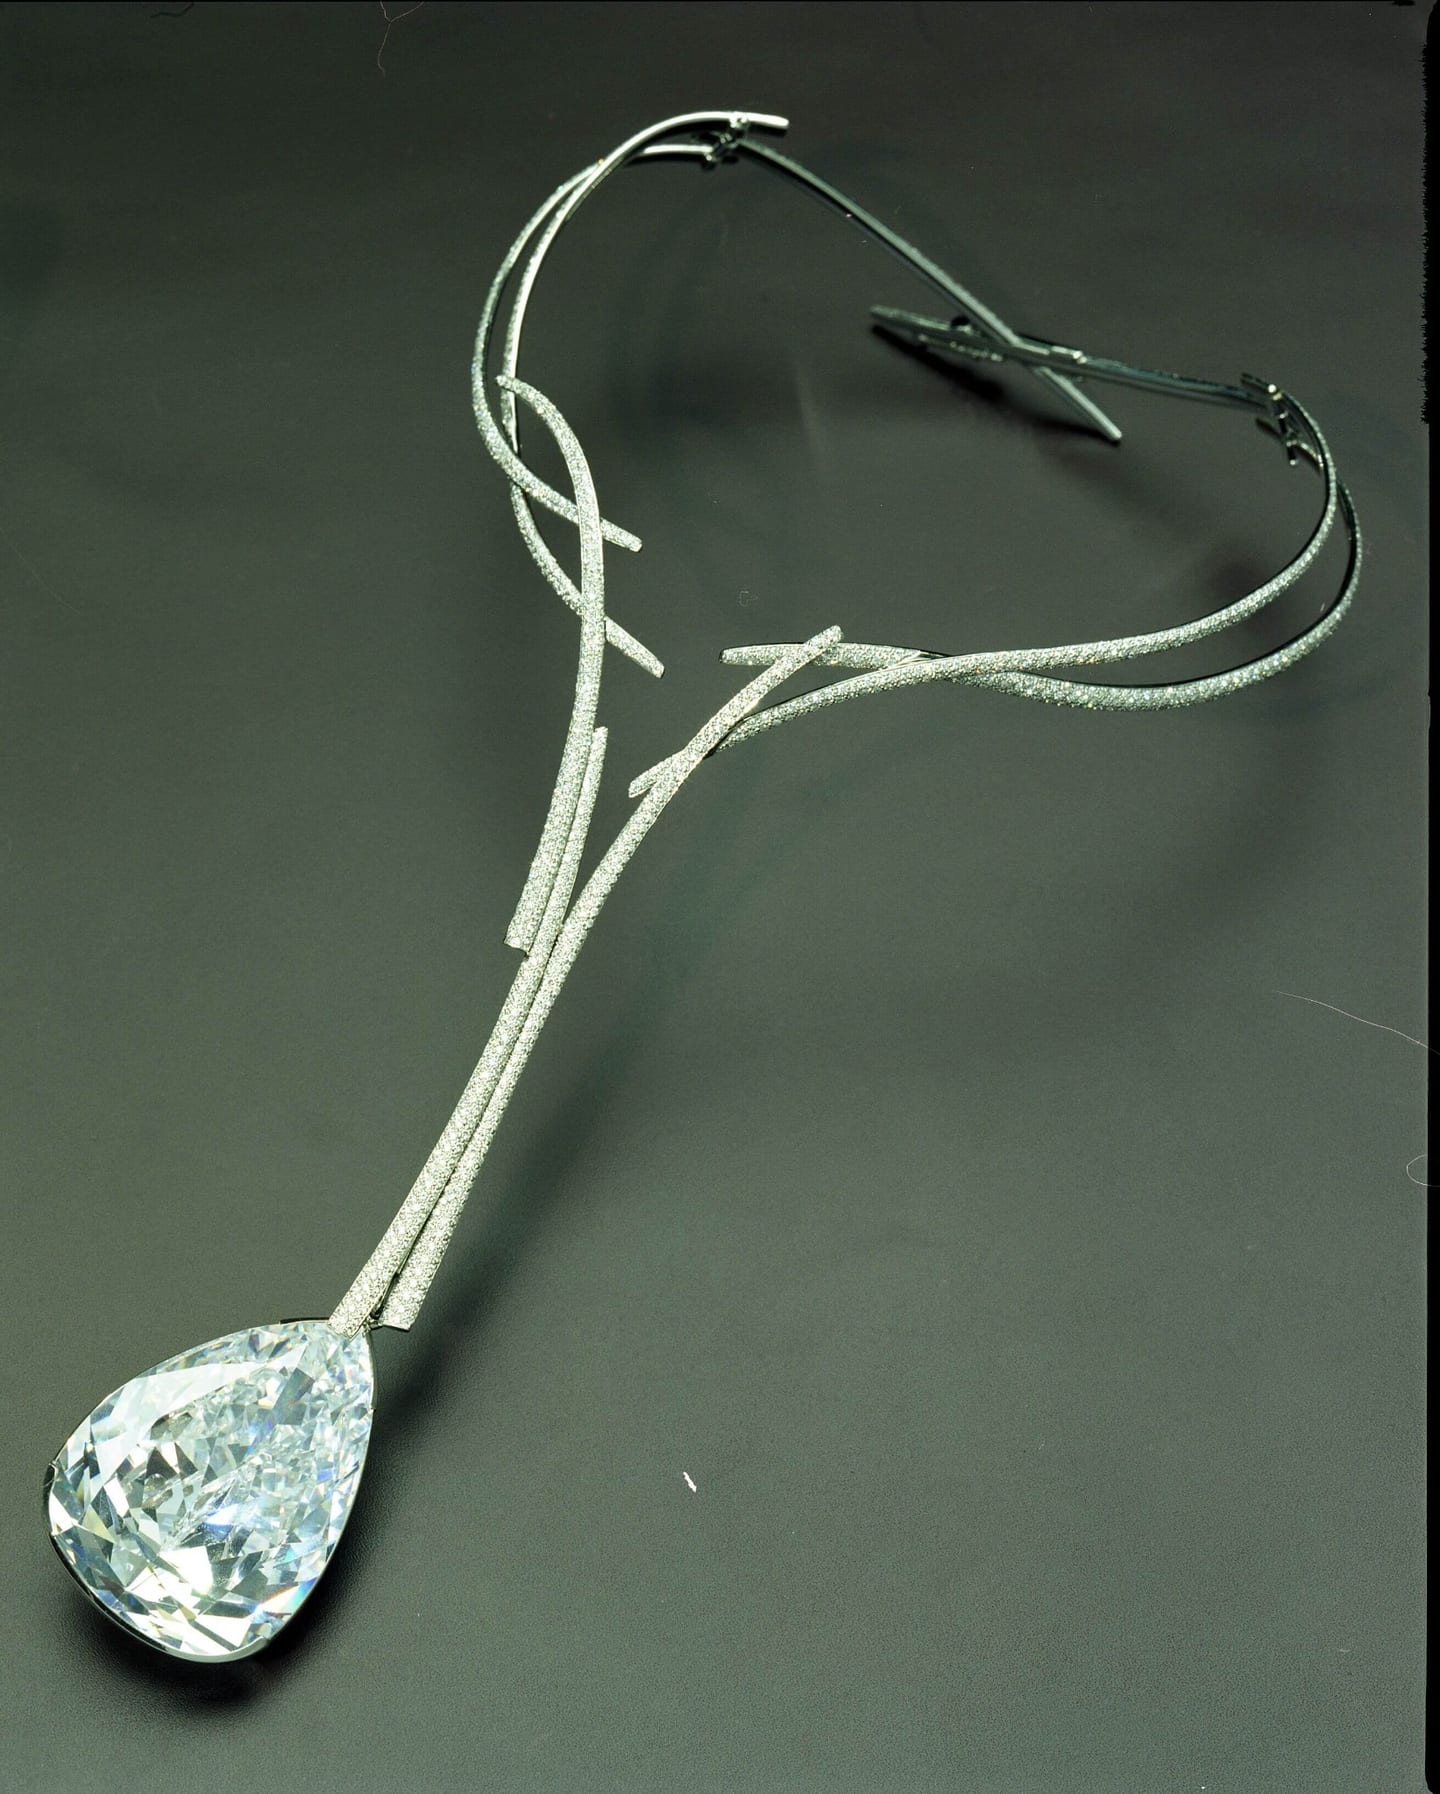
A polished ring has no appearance of its own. It shows whatever surrounds it. Jewellery photographers light the room the jewel reflects, and on film they had to get it right in the camera.
A polished gold ring photographed in an empty black room would be almost invisible: a few specks of highlight on a dark shape. Metal with a mirror finish has no brightness of its own. What the camera records is a reflection of whatever surrounds the piece. The first principle of jewellery photography lighting follows directly: you do not light the jewel, you light what the jewel can see.
The Robert Harper Photograph Library's inventory records 1,607 unique jewellery shots across 6,090 frames. This article describes the general studio craft behind pictures of that kind, as it was practised on film. It does not describe Robert Harper's own methods, equipment or film, which the inventory does not record.
Why does polished metal behave so differently from other subjects?
Most objects scatter light. A wool jumper lit from any direction sends some of that light towards the camera, so it photographs much as it looks. A polished surface does not scatter; it reflects each ray at the same angle it arrived. From the camera position, each point on a curved band of metal is showing a small piece of the studio.
So the photographer builds the surroundings:
- Large, even, light surfaces placed where the metal will reflect them give the bright, smooth tone that reads as polished gold or silver.
- Dark cards placed where the metal's edges reflect them draw the dark lines that give the piece shape. Without them, bright metal on a bright ground has no outline.
- Gradients, a source brighter at one side than the other, give a curved surface a sense of roundness.
The traditional tool is the tent: translucent material surrounding the object, lit from outside, with a hole for the lens. A tent guarantees that the metal sees only light, even tone. Used alone it also produces flat, characterless pictures, which is why experienced still-life photographers treat it as a starting point and then put darkness back in, card by card.
The camera has to hide too. The lens and whatever stands behind it will appear in any surface that faces them. Shooting through a small opening in a white or black card is the standard answer.
How are diamonds and coloured stones lit?
Stones reverse the logic. A faceted diamond is designed to take in light and return it in separate flashes, some white, some split into colour. Under a perfectly even tent there is nothing distinct to return, and the stone looks grey and lifeless.
Diamonds need small, hard sources: a spot, a bare lamp at a distance, a narrow strip. Each produces a bright point that individual facets can catch. They also need dark areas between, because sparkle is contrast. The photographer then makes tiny adjustments to the angle of the stone and the position of the light, watching for the moment the table and crown facets come alive.
A typical ring therefore needs two kinds of light at once: broad and soft for the band, small and hard for the stone. Controlling each without spoiling the other is most of the job.
| Material | What it needs | Common problem |
|---|---|---|
| Polished gold, silver, platinum | Large diffused sources; dark cards for edges | Flat, shapeless tone; reflections of the studio |
| Diamonds and faceted stones | Small hard light and surrounding darkness | Grey, dead stones under purely soft light |
| Coloured gems | Light through or behind the stone as well as on it | Colour going black |
| Pearls | Soft light with a gentle highlight | Losing the lustre, or a hard hot spot |
| Watch crystals and dials | A controlled reflection, or none, across the glass | Glare hiding the dial |
Watches add legibility to the list. The dial, the hands and the maker's name all have to read, through a crystal that will reflect the lights. The watch collection in the archive, 611 unique shots across 1,760 frames in the inventory, belongs to the same family of problems.
How do you keep a small object sharp?
At close range, depth of field shrinks to millimetres. A ring photographed at around life size on the film may be sharp at the front of the setting and soft at the back of the band.
Film-era photographers had three tools.
Aperture. Stopping the lens down increases depth of field, but very small apertures soften the whole image through diffraction, so there is a limit.
Camera movements. On a view camera, the lens and film can be tilted or swung relative to each other. This reorients the plane of sharp focus so that it lies along the subject, for example along a necklace receding from the camera, instead of parallel to the film. Large-format cameras, using sheet film of 4×5 inches and above, were favoured for still life partly for this reason.
Arrangement. The simplest solution is to place the important parts of the piece in one plane and put that plane where the focus is.
Close focusing has a cost in light. As the lens is extended away from the film, the image dims. The correction is the square of one plus the magnification: at life size, (1 + 1)² = 4, or two stops more exposure. With long exposures, film also loses effective sensitivity, an effect called reciprocity failure. Studio flash, fired several times on one frame in a darkened room if necessary, was the usual way to get enough light for a small aperture.
What did film change about the work?
Compared with digital capture, three things.
No preview, except by proof. Reflections and highlights had to be judged on the ground glass and confirmed with instant-film tests. Our article on Polaroid proofing in the studio describes that routine.
Little latitude. Jewellery was normally shot on colour transparency, which holds a narrow range of brightness. A specular highlight on metal is far brighter than anything else in the frame. The exposure had to place the metal's tone correctly and let only the smallest highlights burn out. See why studios shot medium-format transparencies.
Retouching was expensive. Dust, a fibre from a cloth, a fingerprint: at magnification all are conspicuous, and removing them from a transparency meant skilled hand work or costly work at the repro stage. So the cleaning was done before the shutter was pressed. Pieces were polished, handled with gloves or tweezers, and fixed in position with small amounts of wax or putty hidden from the lens.
Colour needed the same care. Film is balanced for a particular colour of light, and the reflective surfaces of jewellery pick up the colour of everything nearby, including the walls. Neutral surroundings mattered.
These constraints explain why working variants are so common in still-life archives. The same set-up would be exposed at several slightly different values, with a card moved or a stone turned between frames. In the Harper jewellery inventory, 1,607 unique shots correspond to 6,090 frames. The inventory does not yet say how those extra frames divide between exposure brackets, alternative arrangements and duplicates, and the counts have not been checked frame by frame against the physical material.
What does the jewellery collection at Archive.London record?
The jewellery collection covers diamonds, rings, necklaces, pendants, bracelets, bangles, earrings, brooches, cufflinks, pearls, crosses, tiaras and grouped collections. Within it, a group associated with De Beers diamonds and the Millennium Star records 35 unique shots across 175 frames. De Beers was among Robert Harper's commercial clients, alongside Harrods, Selfridges and Montblanc among others.
Named brands and objects are catalogue descriptions. They do not imply that any company endorses the archive, and the depiction of a piece is not a warranty of its authenticity, ownership or date. Most of the material is analogue and largely awaits digitisation, so which frames are finished compositions and which are working variants will be established as the transparencies are scanned and catalogued.
For photographers and students, the eventual interest of such a body of work is comparative: the same class of object, lit by one photographer over many years. For anyone judging scans of reflective subjects, the free image histogram tool shows how much of a file's highlight range is clipped, which is the digital form of the question a transparency asked. The closely related problem of glass is covered in photographing fragrance bottles.
A short checklist for lighting a ring
- Clean the piece. Then clean it again under a loupe.
- Fix it in position so that the key planes are parallel to the film or sensor.
- Surround it with diffused light and look at the metal. Where is it flat?
- Add dark cards until the edges and curves are drawn.
- Add a small hard source for the stone. Rotate the stone until it flashes.
- Check the lens is not reflected.
- Proof, adjust one thing, proof again.
The jewellery photographs, and who they may interest
More than half of the Robert Harper Photograph Library is still on film and has yet to be scanned, and only a small selection has been published online by Archive.London, and the jewellery transparencies are among the material still in its boxes. Publishers, jewellery houses, curators and educators who would like to know what the collection holds can enquire through professional access; licences are negotiated directly with the single rights holder, subject to rights review.
Frequently asked questions
What is the best lighting for jewellery photography?
For polished metal, a large diffused source close to the piece, with black and white cards placed to shape the reflections. For faceted stones, add a small, hard source to create points of light. There is no single best set-up: gold, silver, pearls and diamonds each respond differently, and most photographs mix soft and hard light.
Why is jewellery so hard to photograph?
It is small, so the camera works at close range with very shallow depth of field. It is reflective, so it shows the studio, the lights and the camera. And it is unforgiving of dust and scratches, which magnification makes obvious. Each problem has a known solution, but they have to be solved together.
How do you photograph diamonds so they sparkle?
Sparkle comes from contrast. A diamond's facets act as tiny mirrors and prisms, so they need bright points to reflect and dark areas between them. Completely diffuse light makes a diamond look flat and grey. Photographers add a small, direct light and position it, and the stone, until individual facets flash.
How did photographers get everything sharp at close range on film?
They stopped the lens down, accepted the limits diffraction sets on very small apertures, and on view cameras used tilt and swing movements to lay the plane of focus along the subject. They also arranged pieces to lie in one plane. Focus stacking, the digital method of combining many frames, was not available.
Does Archive.London hold jewellery photographs for brands such as De Beers?
De Beers was among Robert Harper's commercial clients, and the archive's inventory records a group associated with De Beers diamonds and the Millennium Star: 35 unique shots across 175 frames. The catalogue description is not a statement that any brand endorses the archive, and details of individual frames await cataloguing.
Published by Archive.London. Corrections are welcome under our editorial policy.